These instructions are best viewed in a desktop or laptop web browser. This lets you view the instructions on one screen while following the instructions on the device you're enrolling.
4 Quick Things to Know Before you Start:
- Back up any personal data, especially on Android SD cards, before you start. There is a small chance of data loss during device encryption, and Duke is not responsible for any data loss that occurs as a result of enrolling your phone.
- You will be required to set a PIN / unlock code for your device as part of enrollment. If you or someone else enters your PIN / passcode incorrectly 10 times, your device will be completely and fully wiped back to factory-new settings. This is to safeguard Duke and personal data should your device get lost and no longer be under your control.
- You'll be asked to acknowledge that Workspace One (formerly known as Airwatch) is capable of doing a number of things with your device, however, Duke’s implementation of Workspace One (formerly known as Airwatch) will only make use of a very small number of those capabilities to keep its data safe. More details on what Workspace One (formerly known as Airwatch) is capable of versus what capabilities Duke will use is available upon request from the DHTS Service Desk.
- For now, this service is for Apple iOS and Google Android devices. Windows Phone has been declared end-of-life by Microsoft and will not be supported. Please do not enroll Windows or Mac laptops or desktop computers at this time.
Apple
Note: to enroll, your device must be running iOS 13 or later. Older versions may appear to work if enrolled, but those devices will be enterprise wiped and unenrolled automatically after enrollment.
1. Delete any Duke Office365 Outlook configuration.
For iOS 14,15. 16: Go To Settings > Mail > Accounts
Note that "Exchange ActiveSync" may be named differently on your device. Scroll down and Delete Account. Yes, this will clear your mail and calendar, but we’ll be putting it back shortly. If you skip this step, you will have issues with accessing your mail in the future and you may have mail set up twice and receive 2 copies of every mail and meeting notification.
2. Open a browser on your mobile device and navigate to https://www.getwsone.com/. If the Workspace One (formerly known as AirWatch) Intelligent Hub app is installed on your device, you will be redirected to it. If not, you will be redirected to Apple's app store to download it. Install it and open it when it finishes installing.
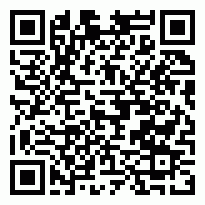
3. Pick QR Code when offered an authentication method and scan this

or alternatively, Enter the Group ID/ DHGeneral and then authenticate via Email Address and use yournetid@duke.edu.
4. Log in with your NetID credentials at the Shibboleth login screen.
5. Pick Employee Owned if you purchased your device, or Corporate Dedicated if it is a Duke purchased device that only you use and tap Next. Do not use Corporate Shared unless directed to by DHTS.
Is this your personal device?
Yes – If you personally owned device
No – If device was purchased by Duke
Pick Employee Owned if you purchased your device, or Corporate Dedicated if it is a Duke purchased device that only you use, and tap Next. Do not use Corporate Shared unless directed to by DHTS.
Is this a shared device? No - device that only you use
Do not use Shared unless directed to by DHTS.
6. Read and Accept the Terms of Use. Those Terms of Use and applicable policies are available on the Duke ISO website.
For IOS 14 or higher please follow steps below or view video at the end of instructions
7. Tap "Continue" change to continue on We value your privacy.
- Set Up your profile
- Tap - Download Profile
- “Hub” Would Like to Send You Notifications - Allow
8. Tap Allow - This site is trying to download a configuration profile
9. Tap Close – Profile Downloaded
10. Tap here when download finishes
- Set Up your profile
- Tap - Install Profile
11. Install Profile
- Tap Open the Settings app
- or Go to Settings >> Profile Downloaded
12. Tap Install
13. Enter your device PIN when prompted
14. Tap Install twice
15. Tap Trust on the Remote Management popup.
16. Tap Done on the Profile Installed screen
17. Go back to Hub app Tap Done Change to - Take me to the Hub
18. Tap Install – App Installation
19. Tap Manage – App Management Change
20. Read Privacy statement – Tap I Understand then I agree
21. To complete mail configuration, go open Apple’s native mail app. This will start your mail and calendars getting synchronized.
23. Go to Settings >> Wi-Fi, and if you have clubs Wi-Fi configured, forget its configuration. Your device should connect to the aces network automatically.
24. Be sure to install any offered applications, particularly the Tunnel app. Tunnel is required for Haiku / Canto and some Duke web site access.

Enrollment is complete! Check out this Now that my device is enrolled KB article to learn about all the new features and new options available.
Android
Note: These instructions have been extensively tested, but due to the differences in different vendors’ Android implementation and differences between Android versions, you setup may vary slightly from the steps as published. These instructions assume you know basic settings on your device, or have someone available who does, in case you have questions. Some steps may be automatically skipped if your device is already compliant - eg. lock PIN or device encryption. Steps 15, 16, and 17, are the most likely.
Also note: And this can’t be stressed enough, make sure you have pictures and other irreplaceable data on your device backed up elsewhere, as data loss can occur, especially during SD card encryption. Enabling full device encryption shouldn’t cause any data loss, but no technology is infallible, and Duke in not responsible for personal data loss.
Finally note: To enroll, your device must be running Android 8.0 or later. Older versions may appear to work if enrolled, but those devices will be enterprise wiped and unenrolled automatically after enrollment.
1. Delete any Duke Office365 ActiveSync mail configurations from your device. You can skip this step if you're using the Outlook or Nine apps. Yes, this will clear your mail and calendar, but we’ll be putting it back shortly. If you skip this step, you may have mail set up twice, and receive 2 copies of every mail and meeting notification.
2. Open a browser on your mobile device and navigate to https://www.getwsone.com/. If the AirWatch Agent app is installed on your device, you will be redirected to it. If not, you will be redirected to Google's Play Store to download it. You may need to log in to the Play Store to install, depending on your device configuration. Install the Agent app, and open it when it finishes installing.
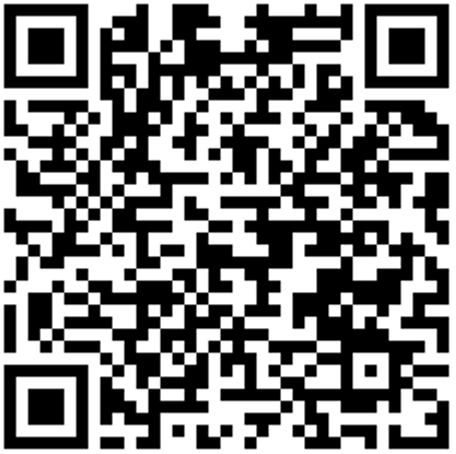
3. Pick QR Code when offered an authentication method, and scan this:

or alternatively, Enter the Group ID/ DHGeneral and then authenticate via Email Address and use yournetid@duke.edu.
4. Log in with your NetID credentials at the Shibboleth login screen.
5. Pick Employee Owned if you purchased your device, or Corporate Dedicated if it is a Duke purchased a device that only you use, and tap Next. Do not use Corporate Shared unless directed to by DHTS.
6. Read and Accept the Terms of Use. Those Terms of Use and applicable policies are available on the Duke ISO website.
7. Click “I understand” for the privacy agreement and either “Not Now” or “I Agree” for the data sharing.
8. Click “Accept & continue” to set up the work profile.
9. Click “Next” to continue when prompted for data being visible to IT admin.
10. Click Add automatically for the shortcuts if you prefer to have those on your desktop. Otherwise, click cancel.
11. Compliance can be a little slow at times. Be patient. It will eventually make your device compliant to which it will then prompt you to set a PIN on your device. If you already have a PIN on your device it will want to verify that PIN by asking you to enter it. It may or may not show you a physical prompt on the device, you may have to check your notifications for the initial prompt.
12. Once the compliance has been validated and the profiles have been downloaded to your device you will be able to setup Gmail to download your work email.
13. Once Gmail is setup click on the entry inside the client to be notified about new emails OR “Dismiss” if you would rather not receive emails when they arrive. This will enable the device to have push notifications. Otherwise, it will check the server at specified intervals. To verify, you can 3 slashes at the top left corner of the screen, scroll down to settings, select your work account and check the “Sync frequency”. It should be set to “Automatic (Push)”.
14. Tap Play Store when offered to have an application installed. Install the offered applications, particularly the Tunnel app. The tunnel is required for Haiku / Canto and some Duke Website access. If you're not prompted to install these, see step 23.
15. You’re almost done! Click Exit to complete the enrollment.
16. If you weren't prompted to install Tunnel and VMware Browser, go to Agent >> Managed Apps and tap on Tunnel and Browser in the list to go through the install for each.
17. Go to Wi-Fiin your device Settings. If you have clubs wifi configured, forget its configuration. Your device should connect to the aces network automatically.
Enrollment is complete! Check out this Now that my device is enrolled KB article to learn about all the new features and new options available.
Other useful links:
- After you've enrolled - There's good information for all new users. Owners of Google, Moto, Blu, and other Android devices that didn't get mail configured in step 19 should read this for mail options.
Please contact the DHTS Service Desk at 919-684-2243 or via the Self Service Portal if you have any questions.
Regards,
Duke Health Mobile Device Manager Team